As the title implies, it’s springtime here in the Yoop! I can almost taste the grilled goodness that is in store.
Things are about to get busy on the farm here too, equipment is being prepped for field work, some last minute touches are going to be done on our livestock fences here, and then we’ll be off into planting for most of May.
I don’t help with the planting very much, although there was that time I was the grain drill monitor for Andy a couple years ago….
So planting season is pretty busy for me too in that I lose my helpers to the big farm’s needs. I did want to get this recipe out to you all though so that you can get your sauerkraut game-face on before it’s time to throw on the polish sausage or brats! It might take you a couple batches to perfect your technique and I definitely want you to have time to do that!
I had totally forgotten how much bulk you loose from a head of cabbage in the kneading step, so if you want to fill a half-gallon ball jar to ferment, double this recipe. Then you’ll have enough for more than just yourself 😉
You can freeze or can the kraut to keep it longer, but I don’t recommend it. You’ve created all those gut healthy bacteria, now don’t ruin them! Don’t heat it before eating either, just straight from the jar. Keep this batch in the fridge, and when you get low, start another. You can have fresh kraut all summer long! It lasts MONTHS in the fridge and will just keep getting better and better. Yum!
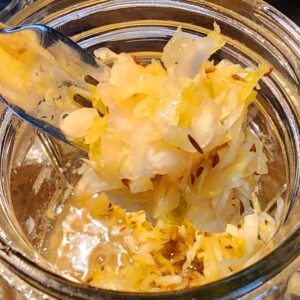
UPDATE 4/26/23! I let the kraut ferment for five days and then tried it, and it was perfect! I transferred it into a quart size jar and put it in the fridge to slow the ferment. We’ll be enjoying it for weeks- I’m sure it won’t last a month. I will also use a couple tablespoons of the brine from this batch to start another, in addition to the salt and seeds in the recipe. It just helps the ferment get going a little quicker.
If you give it a whirl, let us know how it went!
Traditional Sauerkraut
Equipment
- 1 Wide mouth mason jar w/ lid Quart size or larger
- 1 Large non-metal mixing bowl
- 1 Fermenting lid with airlock Optional- can use regular wide mouth lid in a pinch
- 1 Small Plate For under the jar
Ingredients
- 3 lb Cabbage, about 8" diameter Washed
- 1.5 tbsp kosher salt I used Celtic Sea Salt
- 1 tbsp Caraway Seeds- optional or to taste
- 2 tbsp Brine from a previous lacto-ferment kraut batch Optional to speed fermentation, not necessary.
Instructions
- Wash and dry all equipment and hands well!
- Remove the outer wilted leaves from the cabbage and discard. Quarter the head of cabbage and remove the stem and core. Save one large, inner leaf for later…
- Take each quarter and chop into thin ribbons and place the slices in a large bowl. Repeat with the rest of the cabbage. You can make your ribbons as thick or thin as you like.
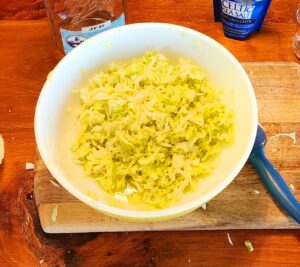
- Add the salt to the cabbage and knead with your hands for about 8-10 minutes, working the salt into the cabbage.
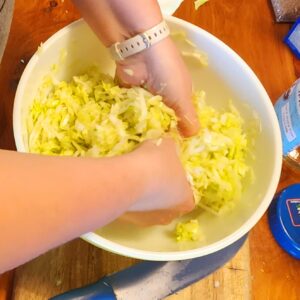
- When you're done, the cabbage will have reduced in bulk by about half and there should be some nice, briny liquid in the bottom of your bowl. If you are using the optional brine from another lacto-ferment, you can add it now.
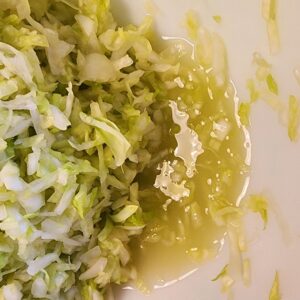
- At this point, if you are using them, you can add the caraway seeds and mix them in evenly. I love a traditional kraut, so I definitely do not skip this step!
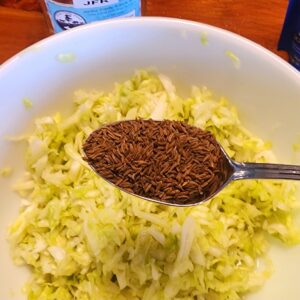
- Transfer cabbage and liquid from your mixing bowl to your wide mouth jar.
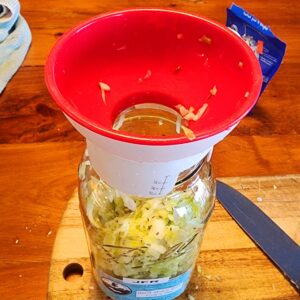
- Press the cabbage down into the jar with your fist as you go to squeeze the brine to the top. Once all the cabbage is in the jar, cut the reserved cabbage leaf to size and place it on top of the shredded cabbage, covering the top to keep it all under the brine. You can also add a weighted jelly jar to the jar, placed on top of the leaf, to keep everything down under the brine.

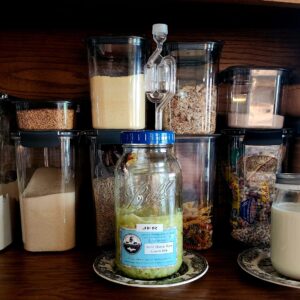
- Place your airlock lid on top tightly, add water to the airlock to the 'max' line (mine is marked) and place it in on a plate at room temperature. If you don't have an airlock lid, you can use a regular wide mouth jar lid on loosely so that the jar can vent as the cabbage ferments. I always put a plate underneath my fermenting jars just in case it gets bumped or bubbles over.
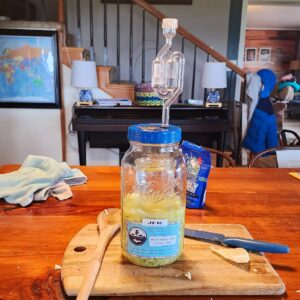
- Press the cabbage down every day to keep it under the liquid brine. If you don't get enough brine to cover the cabbage, you can dissolve 1 tsp salt in 1 cup of water and add this to your jar. It's important that the cabbage stays completely covered. (this picture is from 24 hrs later)
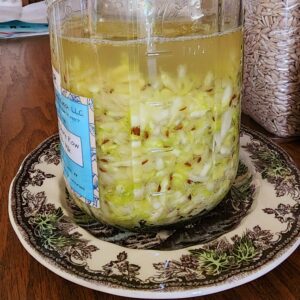
- If you see white scum or mold floating on top, it should be skimmed off and discarded. There can also be mold that forms on the top of the kraut at the end of fermentation, just discard that layer and what is below is fine!
- You can check the taste and texture after a few days, and let it ferment until you are happy with both. I like my cabbage to still have a little body to it, other folks might like it more mushy. Once you are happy with it, you can move the jar (with a tight regular lid) to the fridge and it will stay fresh for a few months, but I doubt it will last that long!


Sounds delicious! And not too hard. Good instructions and pictures. Love sauerkraut.
Thank you! Love all things cabbage! And love your Polish sausage!